The Tab feature is aimed at helping dashboard users organise large numbers of data requests for many different properties.
The aim is to allow user to move all profiles into a tab and to then use that tab for any follow up requests or actions relating to any particular property.
The Tab can be created automatically by any accounts using the integration with emails from platforms such as Daft.ie. Contact support@planetverify.com if you would like to enable this.
Note that the Filters Panel works in tandem with Custom Tabs- so for example if you have already selected Filter by date: Last 1 day and you then look at a Tab, you will only see profiles from the last 1 day that are in the Tab and if the profiles in the Tab are all older than 1 day you will not see them unless you also change the date filter.


Click on Custom Tabs to see any existing Tabs.
Click on a Tab to select it and view the profiles in the Tab.
Any follow up profile requests sent when you are in a Tab will be automatically retained in the Tab.
If you hide the Tab all the profiles will be still visible in the All Open Tab. You must close and approve or decline all profiles as usual when you are finished with the property.
All Open TAB shows all open profiles regardless of whether they are in a Tab or not. Note: If you select a profile here that is already in a Tab and create a new Tab for it, the profile will automatically move to the new Tab.
No tab applied - this tab is used to show you all remaining open profiles that have not yet been allocated to a Tab.
Create a Tab Manually
You can create a TAB manually as follows:
Select any profile or a number of profiles that you want to have in a separate Tab. We recommend use the Filter by reference to get the profiles you want. Untick Select all and tick only the references you are interested in.
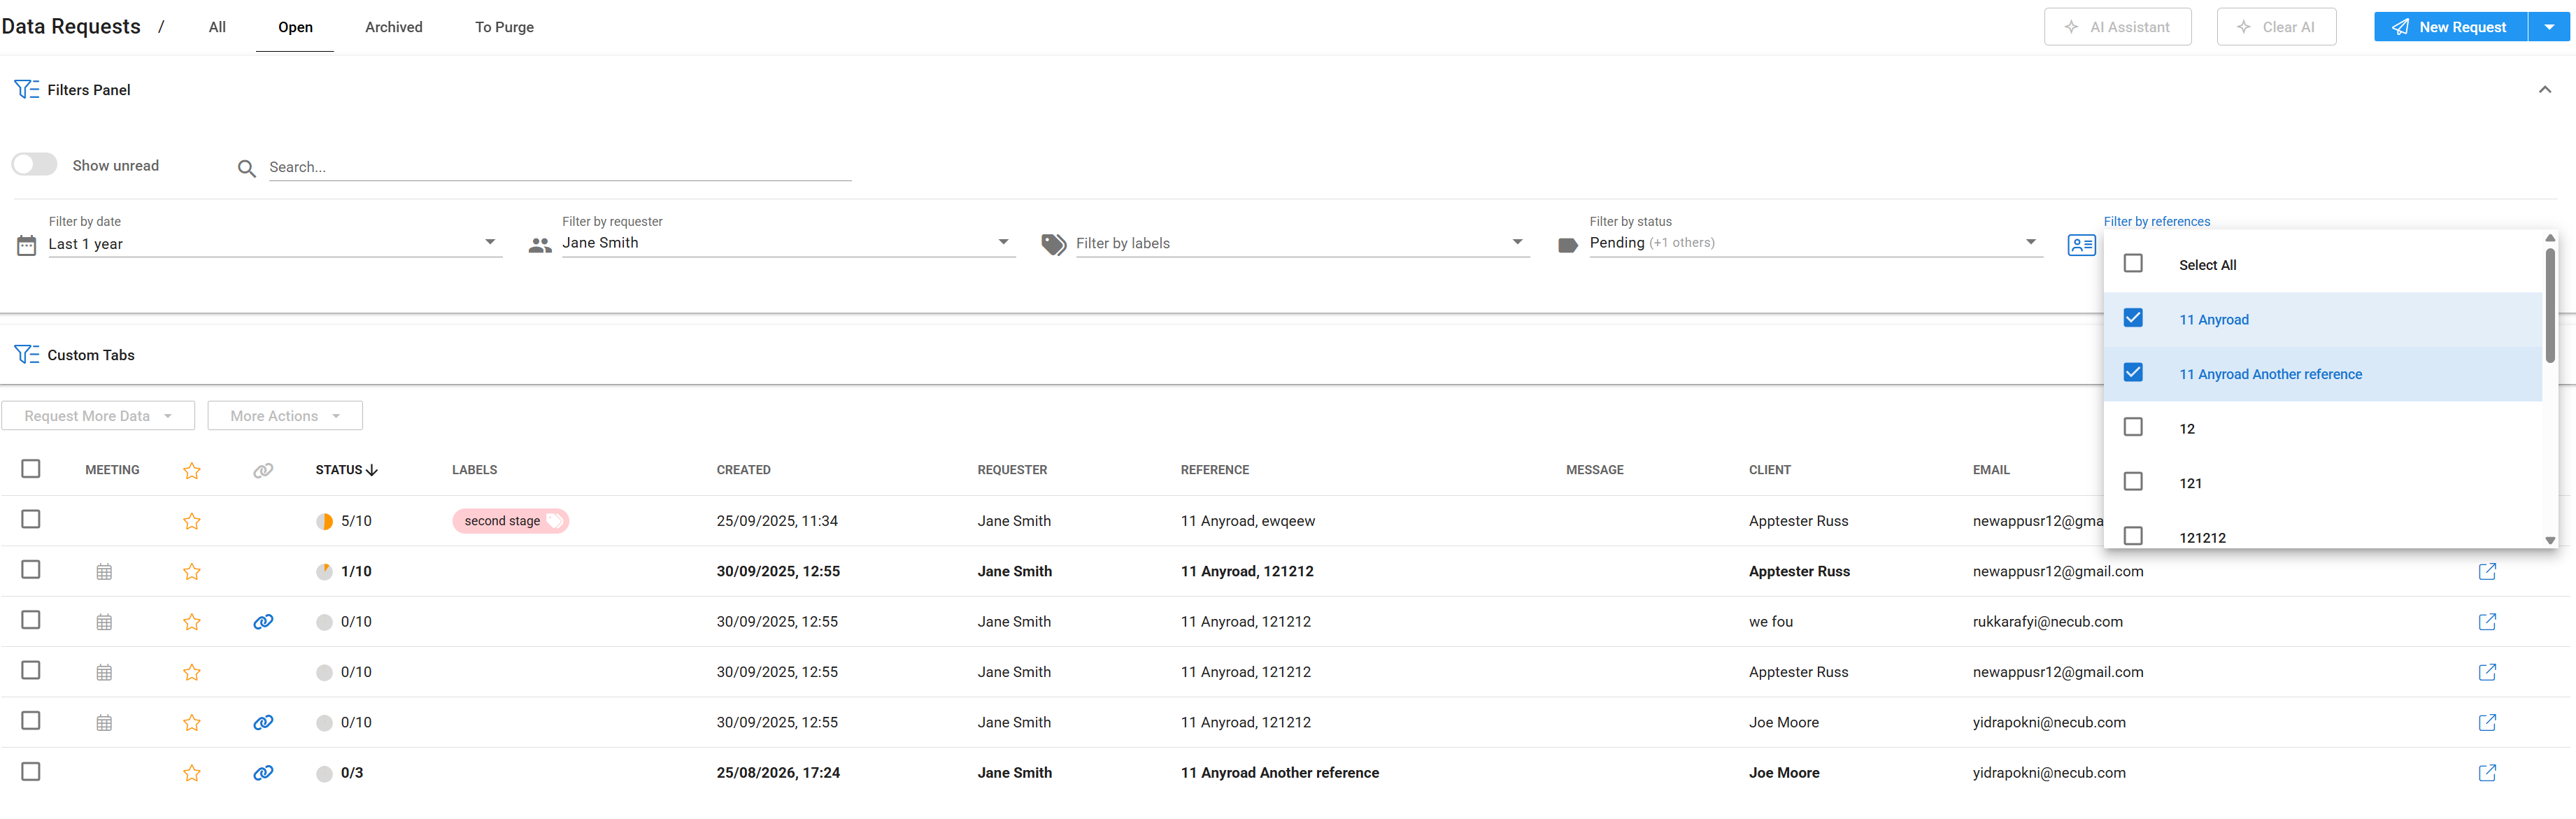
Now Select all the profiles for the property reference you want to include.
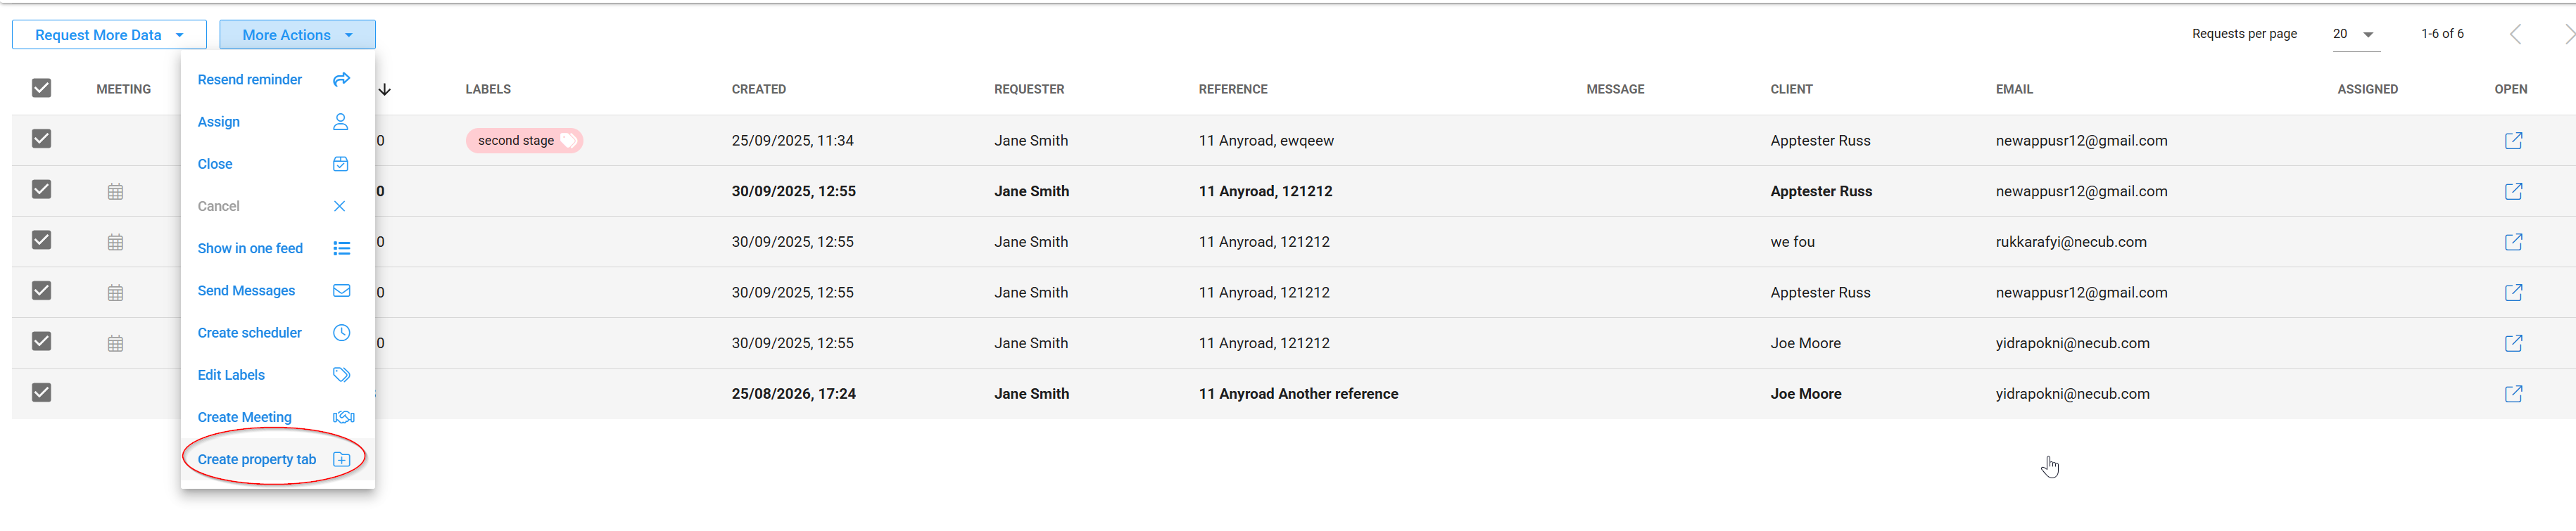
Click Create property tab
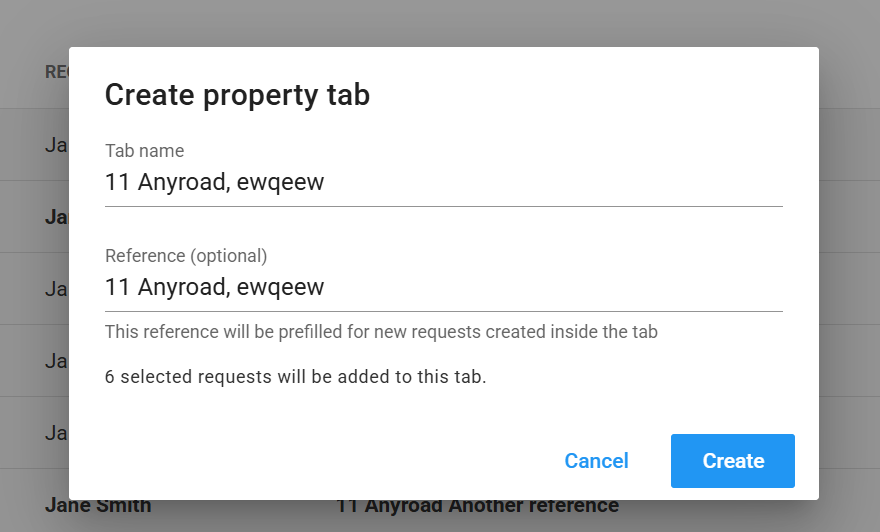
A popup will fill in the TAB name automatically. It will also fill in the Reference automatically. You can edit both of these to suit.
In this case I choose to call the Tab 11 Anyroad and remove the second word. I also changed the reference to include the full address (this is the reference that will be used in any follow up requests sent in the Tab).
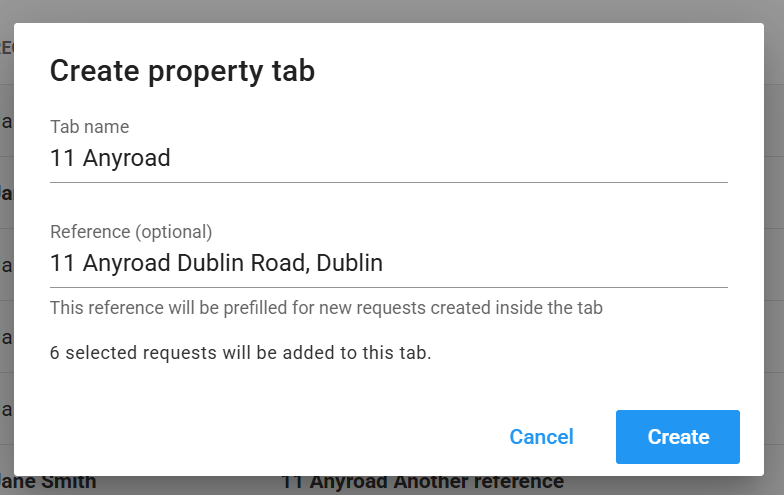
Now click Create to move all these profiles to the new TAB.
Click on Custom Tabs to see all tabs
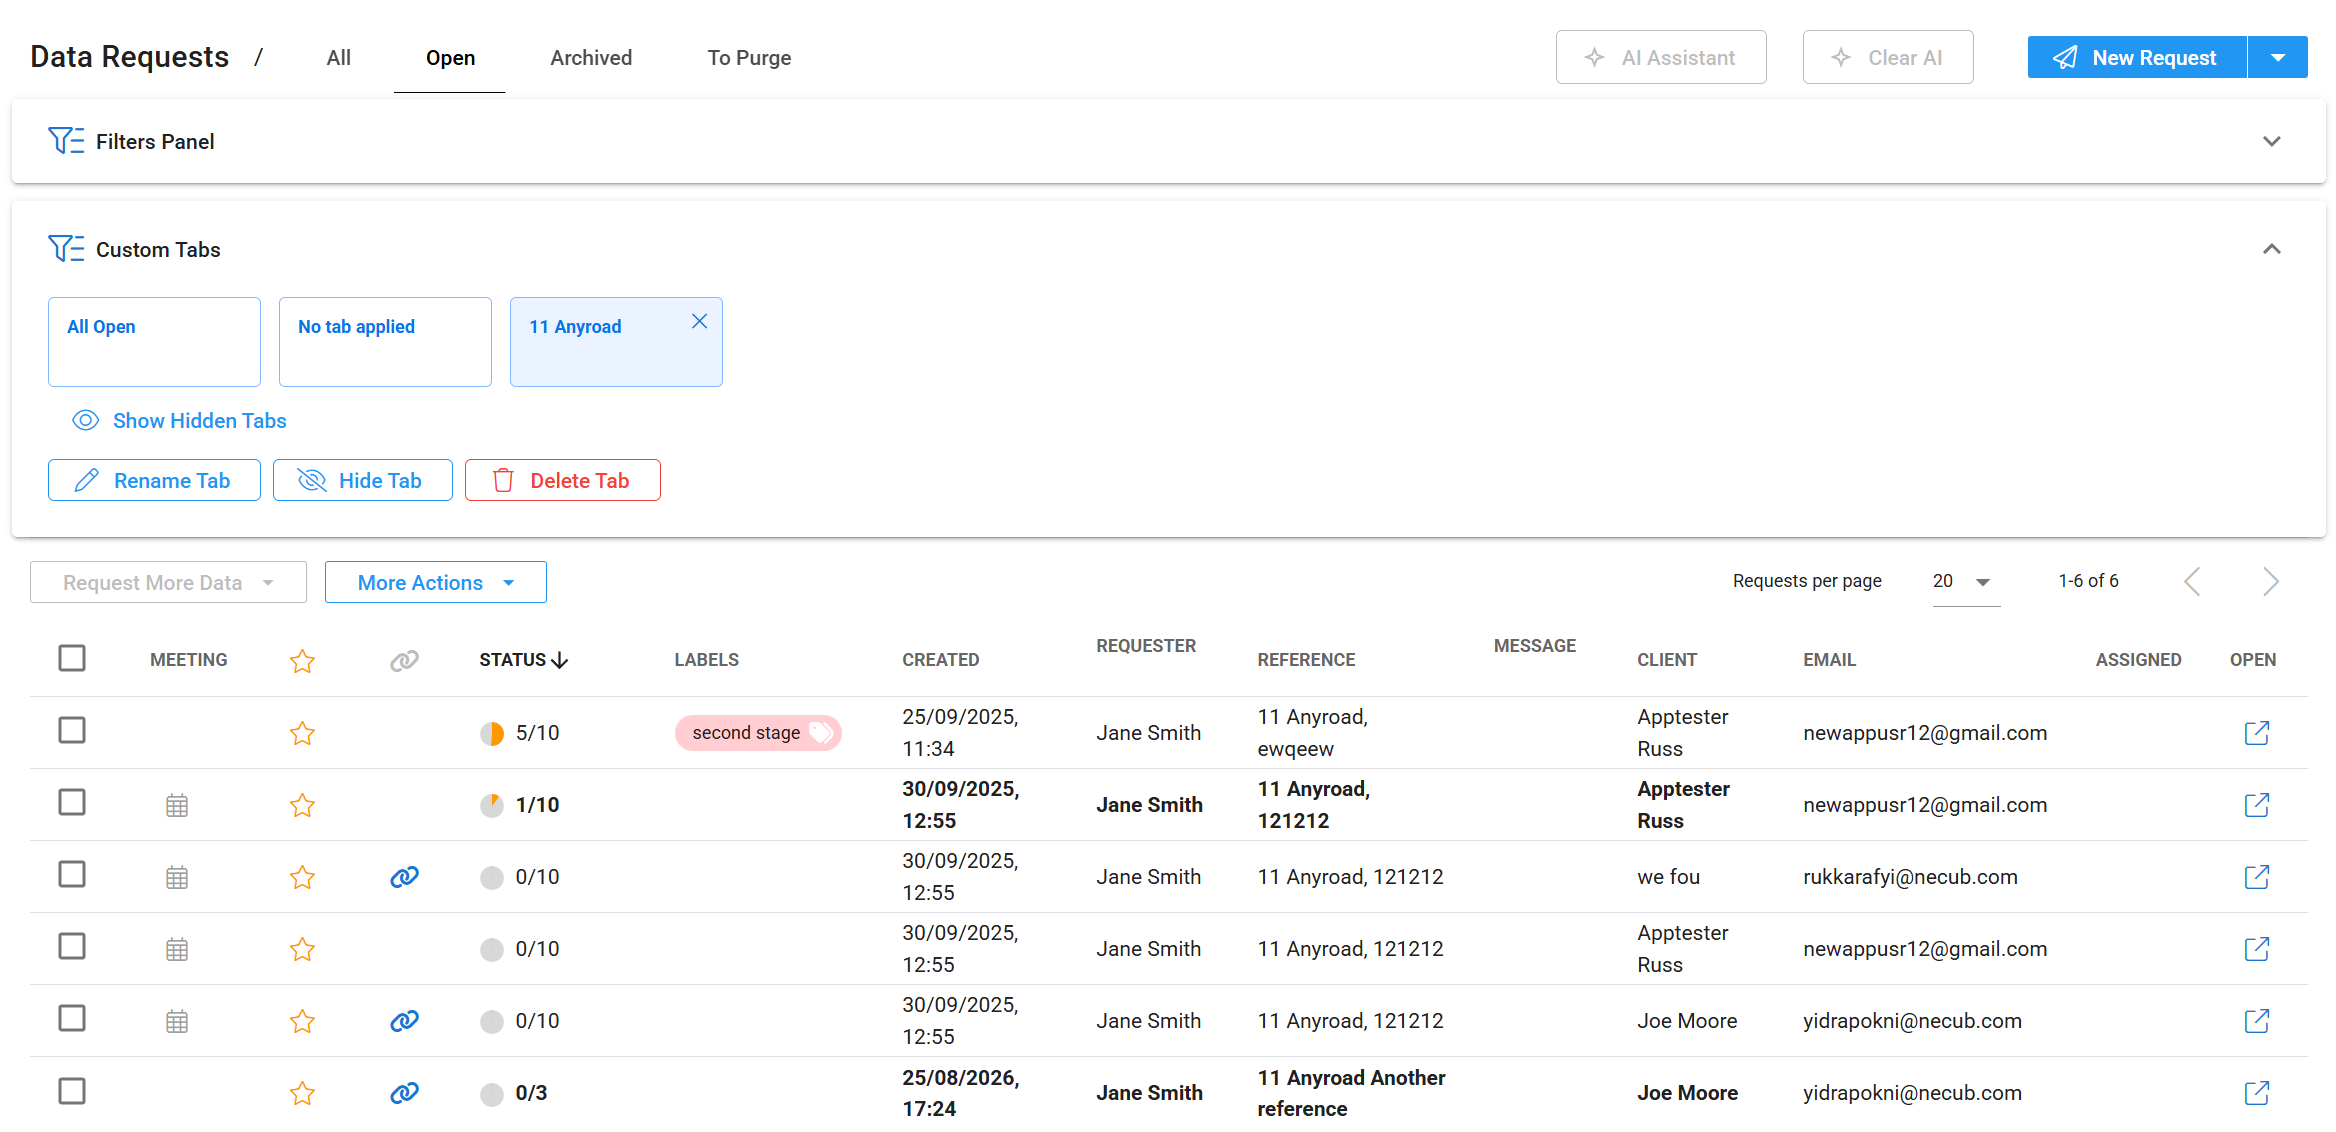
You can Rename or Hide any Tab as required.
Click on the x on any tab to Hide it. You can also choose to see all the hidden tabs or to not show them.
You can only delete a tab once all profiles in the Tab are Closed and Purged. Alternatively, you can remove any profiles from a tab and then delete it.
