Once you have collected all the required information from your profile subject, you can view everything by clicking on the profile or use the icon to open in another tab.

Once you view the profile, you carry out a number of actions using the menu on the top of the screen.

1- Guest request link
More info about Guest requests here
2- Guest request QR code
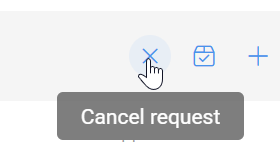
3- Cancel profile (can only cancel if no data is returned)
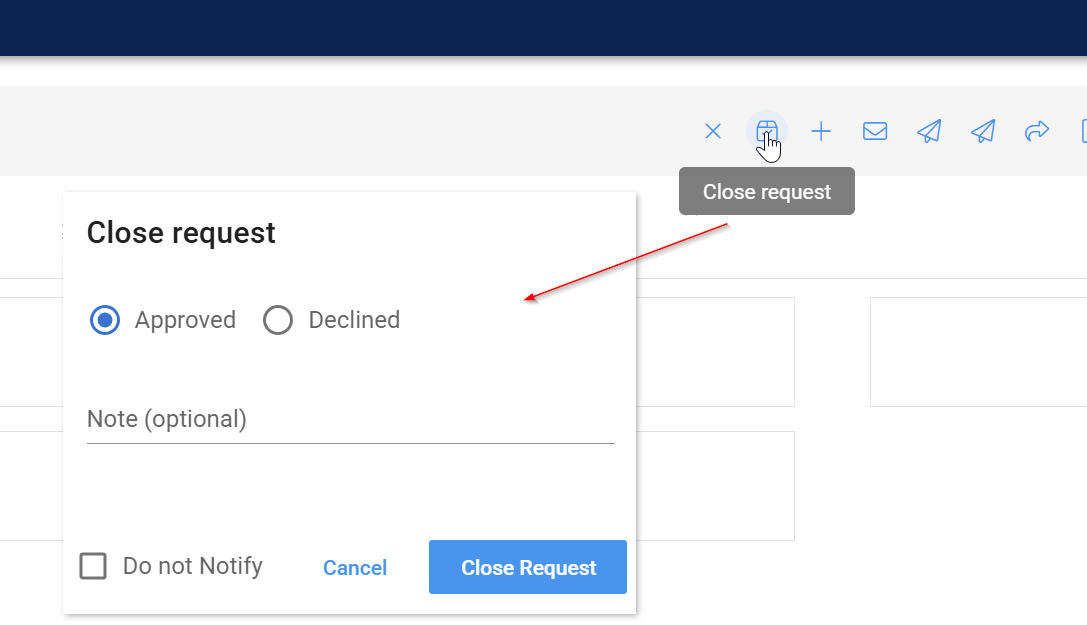
4- Close Profile (User can either Approve or Decline , profile will be saved or deleted depending on settings in the template, profile applicant may be notified )
5- Add items to data request
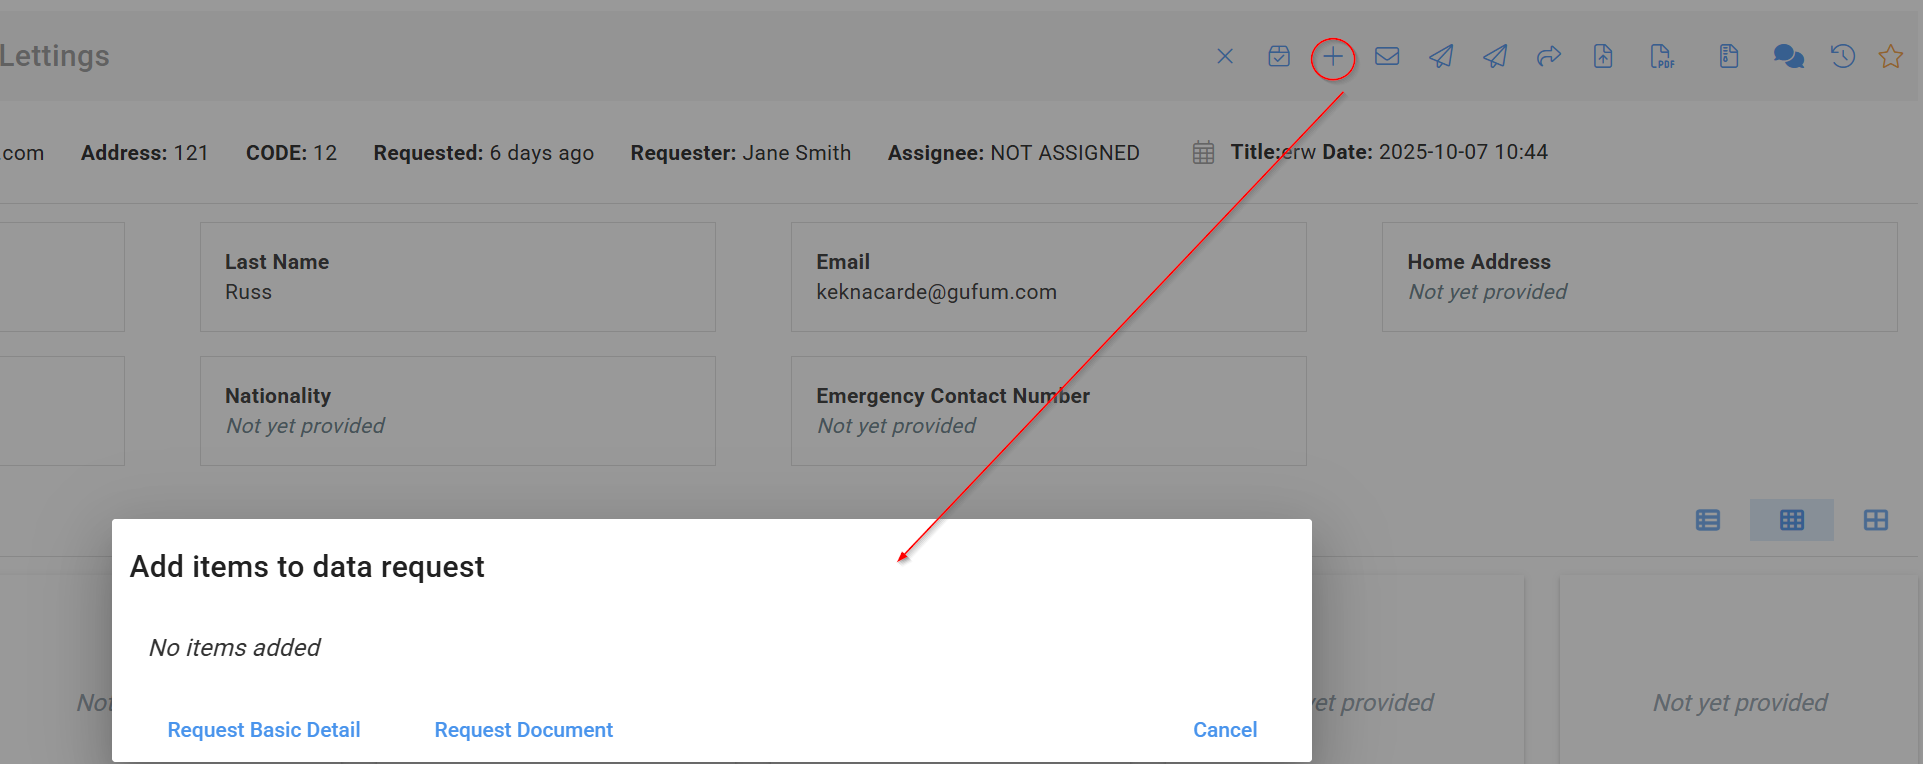
User can select to request an additional detail (such as phone number) or an additional document and include an attachment as well in outgoing email.
6- Send an email message to the profile applicant (one way only from noreply)
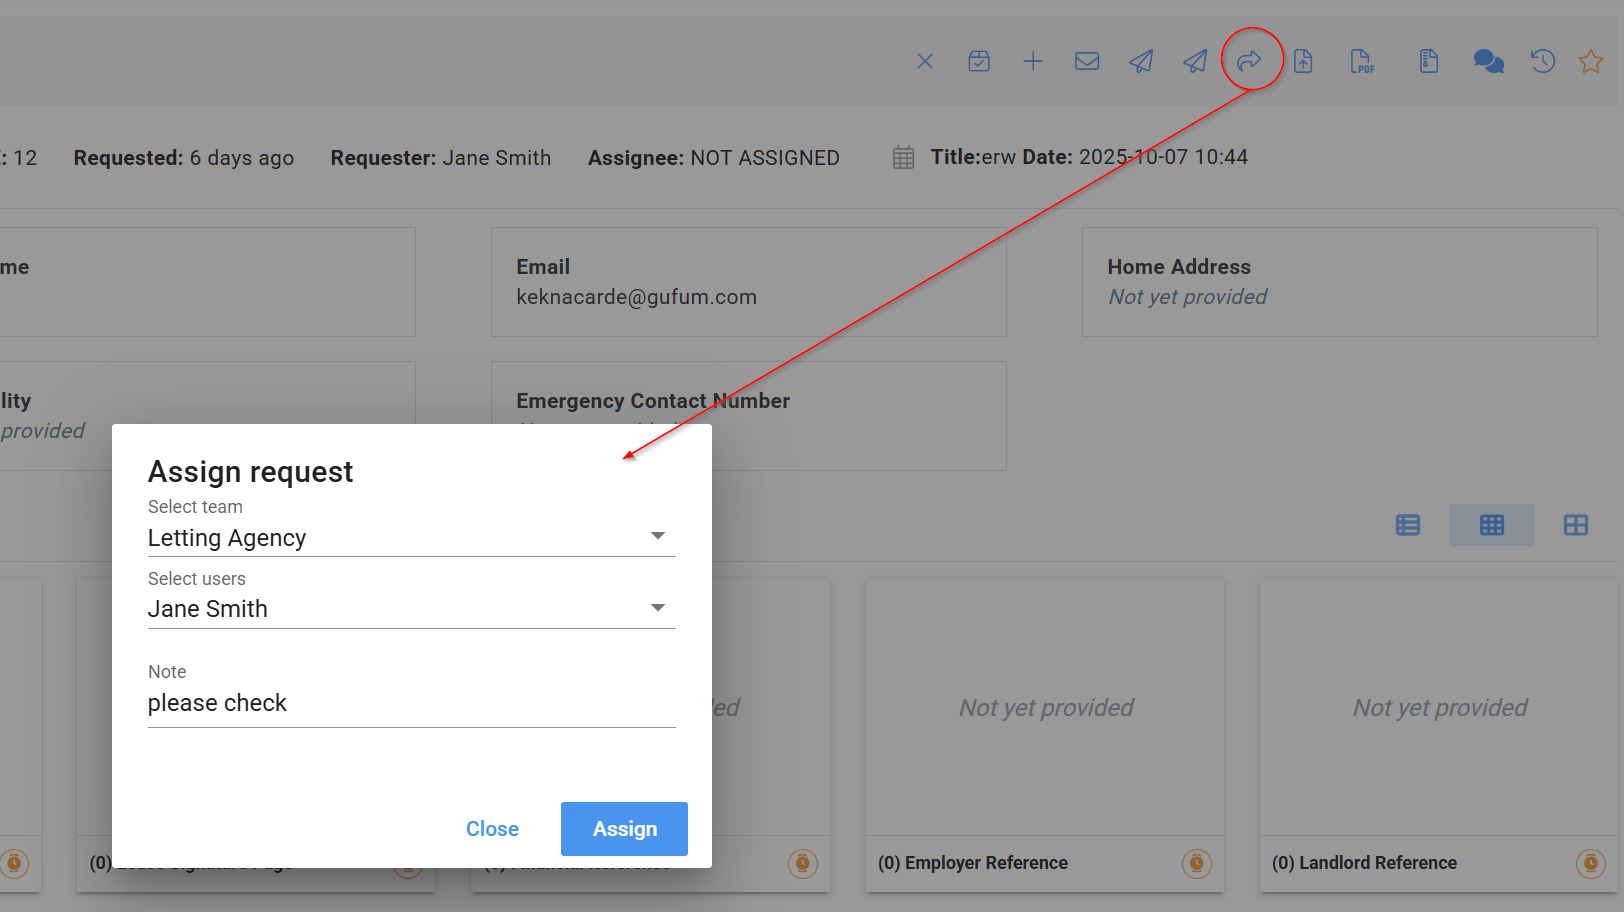
7- Assign profile to a team member
8-You can attach any documents from your own device to the profile

9- Generate a PDF from all data submitted in the profile, including comments
10- Generate a compressed zip file of the PDF created in step 9
11- Add a comment to the profile. This can be viewed by other dashboard users only or included in the PDF report.
12 View the list of historical actions performed on the profile by dashboard users
13- Add a star to mark this profile as a favourite or to help filter on the main requests screen